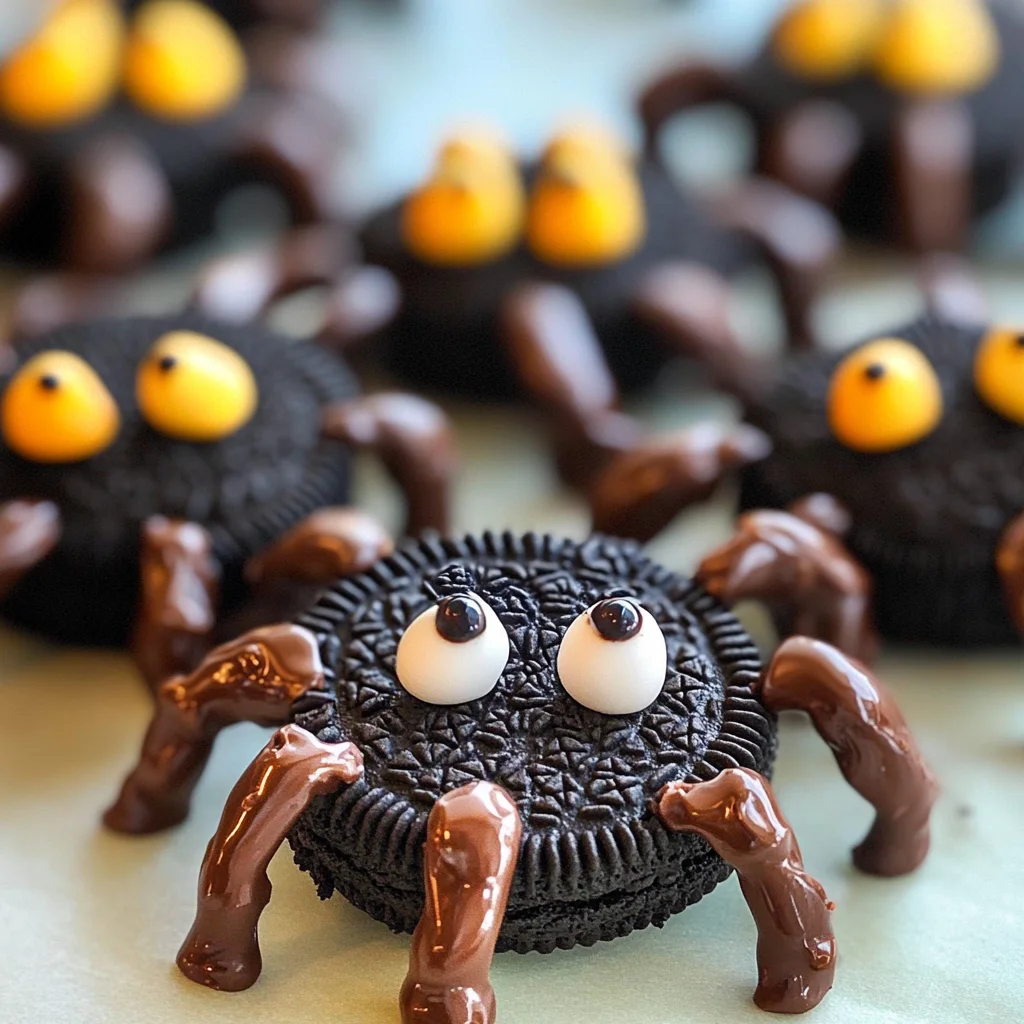
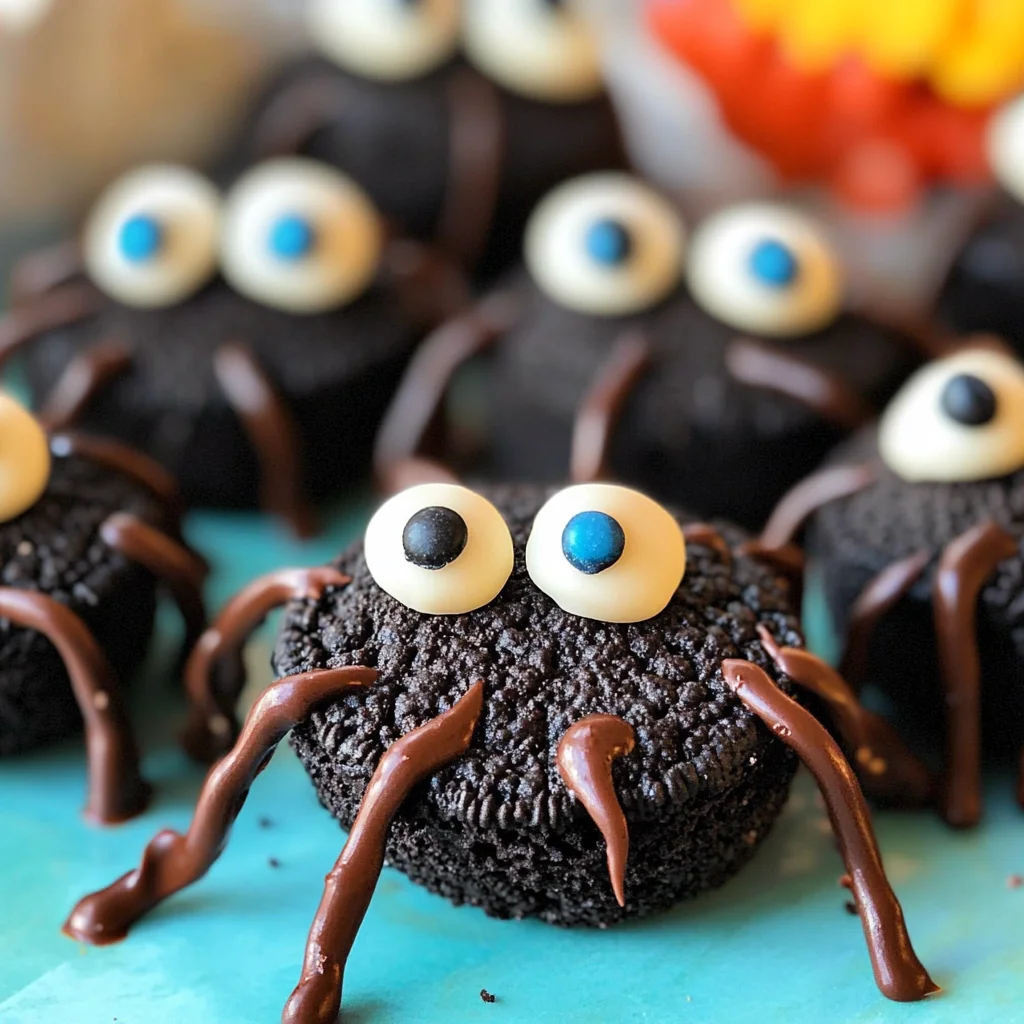
Spider Oreo Treats
If you’re looking for a festive and adorable treat to whip up for Halloween, I’ve got just the thing! These Spider Oreo Treats are not only super easy to make, but they’re also a hit with kids and adults alike. With just four simple ingredients, you can create these creepy crawly delights that add a touch of whimsy to any Halloween gathering. Whether it’s a school party, a family get-together, or just a fun night in, these treats are sure to put a smile on everyone’s face.
What makes this recipe truly special is how quickly you can prepare it. In just 20 minutes, you’ll have 25 delightful spider treats ready to charm your guests. Plus, they’re perfect for little hands to help out with—rolling the Oreo balls and placing those candy eyeballs is always a fun part of the process!
Why You’ll Love This Recipe
- Quick to Make: With only 10 minutes of prep time, you can have these tasty treats ready in no time.
- Family-Friendly Fun: Kids love helping in the kitchen, and creating their own spiders makes this activity extra special.
- Cute Presentation: These Spider Oreo Treats are visually appealing and will impress anyone at your Halloween party.
- No-Bake Delight: No need for baking; just mix, roll, and decorate!
- Versatile Treats: You can easily customize them with different toppings or variations.
Ingredients You’ll Need
Let’s keep things simple and wholesome with these easily accessible ingredients. You likely have most of them already in your pantry! Here’s what you’ll need to create these adorable Spider Oreo Treats:
For the Treats
- 18 oz. package of Oreo cookies
- 8 oz. cream cheese (softened)
- 6 oz. chocolate melting wafers
- 50 candy eyeballs
Variations
This recipe is wonderfully flexible! If you want to get creative or tailor it to different tastes, here are some fun variation ideas:
- Add Different Candies: Swap out candy eyeballs for gummy worms or other candy decorations for an even spookier look!
- Try Different Flavors: Use flavored Oreos (like mint or peanut butter) to change up the taste profile.
- Make Mini Spiders: Instead of rolling larger balls, make smaller ones for bite-sized treats that are perfect for snack tables.
- Use White Chocolate: If you prefer white chocolate over regular chocolate, feel free to switch it up!
How to Make Spider Oreo Treats
Step 1: Create the Oreo Crumbs
Start by putting the Oreo cookies into a food processor until they turn into very fine crumbs. This crumbly mixture forms the base of our spider bodies. Once they’re ready, set aside about 2/3 cup of the crumbs; we’ll use this later for coating.
Step 2: Mix in Cream Cheese
Next, cut the softened cream cheese into chunks and add it into the food processor along with the remaining Oreo crumbs. Blend everything together until well combined. This step is crucial as it creates a creamy and delicious mixture that binds everything together.
Step 3: Form the Spider Bodies
Using a small spoon or melon baller, scoop out 25 small balls of the Oreo mixture and roll them into little spheres. After rolling each ball, gently coat them in the reserved Oreo crumbs. This gives your spider bodies that classic dark color while adding a bit of texture!
Step 4: Melt Chocolate for Legs
In a microwavable bowl, melt your chocolate melting wafers. Stir every 20 seconds until completely melted. It’s important not to overheat the chocolate so that it stays smooth and easy to work with.
Step 5: Pipe Spider Legs
Transfer the melted chocolate into a small squeeze bottle or ziplock bag (just snip off one corner). On a piece of parchment paper on a baking sheet, pipe lines resembling spider legs—think L shapes! This will create fun little legs for our spiders.
Step 6: Chill the Legs
Place your cookie sheet with spider legs into the freezer for about 10 minutes until hardened. Chilling helps ensure that your legs hold their shape when you attach them later.
Step 7: Assemble Your Spiders
Once everything has cooled down, take a small dot of melted chocolate and attach one candy eyeball onto each spider body. The chocolate helps keep those cute eyes in place!
Step 8: Add Legs
Finally, once your legs are nice and firm, insert six legs into each spider body. Now your Spider Oreo Treats are complete and ready to scare up some smiles at your next Halloween celebration! Enjoy making these delightful treats together with friends or family—it’s all about sharing joy through deliciousness!
Pro Tips for Making Spider Oreo Treats
Creating these delightful Spider Oreo Treats is a breeze, especially with a few handy tips to ensure they turn out perfectly!
-
Use room temperature cream cheese: Soften the cream cheese before mixing to achieve a smooth and creamy texture that binds well with the Oreo crumbs.
-
Chill the mixture: If your cookie mixture is too sticky to roll into balls, pop it in the fridge for about 15 minutes. This makes it easier to handle and shape.
-
Melt chocolate carefully: Heat the melting wafers slowly in the microwave, stirring frequently. This prevents scorching and ensures a perfectly smooth consistency for piping.
-
Be creative with leg shapes: When piping the chocolate legs, don’t worry about making them identical! Irregular shapes can add to the fun, giving each spider its unique character.
-
Experiment with decorations: Feel free to use colored sprinkles or edible glitter on your spiders. This can make them even more festive and appealing, especially for kids!
How to Serve Spider Oreo Treats
Presenting these cute treats can be just as fun as making them! Here are some great ideas to serve your Spider Oreo Treats during Halloween parties or family gatherings.
Garnishes
- Chocolate drizzle: A light drizzle of melted chocolate over the top adds an extra touch of sweetness and visual appeal.
- Sprinkles: Use Halloween-themed sprinkles to sprinkle around your serving dish for a festive look that enhances the spooky vibe.
Side Dishes
- Fruit platter: A colorful assortment of fruits like oranges, grapes, and strawberries adds freshness and balances out the sweetness of the treats.
- Veggie sticks with hummus: Crunchy veggies such as carrots and celery paired with creamy hummus provide a healthy and savory contrast to your sweet spiders.
- Popcorn: Offer a bowl of popcorn seasoned with a little salt or dressed up with caramel for a delightful mix of textures that complements your treats.
- Cheese platter: Include some mild cheeses alongside crackers for a savory option that pairs nicely with all things sweet and spooky.
These ideas will help enhance your Halloween festivities while keeping everything deliciously fun! Enjoy making these adorable Spider Oreo Treats and have an amazing time sharing them with friends and family.
Make Ahead and Storage
These Spider Oreo Treats are perfect for meal prep, making them a great option for Halloween parties or family gatherings. You can easily prepare them in advance and store them, ensuring that you have delicious treats ready when you need them!
Storing Leftovers
- Store any leftover Spider Oreo Treats in an airtight container at room temperature for up to 3 days.
- If you prefer, you can refrigerate them for a firmer texture and longer shelf life, up to a week.
Freezing
- To freeze your Spider Oreo Treats, place them in a single layer on a baking sheet and freeze until solid.
- Once frozen, transfer the treats to a freezer-safe container or bag. They can be stored in the freezer for up to 2 months.
Reheating
- There’s no need to reheat these treats; they are best enjoyed chilled or at room temperature.
- If they’ve been in the freezer, allow them to thaw in the fridge for a few hours before serving.
FAQs
Here are some common questions about making Spider Oreo Treats.
Can I use other types of cookies for Spider Oreo Treats?
Yes! While Oreos provide a classic flavor, feel free to experiment with other chocolate sandwich cookies as well. Just ensure they don’t contain any pork-derived ingredients.
How do I decorate my Spider Oreo Treats?
To add extra flair, consider using sprinkles or edible glitter along with the candy eyeballs. Your creativity can make each spider unique!
What are some alternatives to cream cheese in Spider Oreo Treats?
If you’re looking for a dairy-free option, try using vegan cream cheese alternatives. Just make sure it has a similar consistency to traditional cream cheese.
Can I make Spider Oreo Treats ahead of time?
Absolutely! These treats store well and can be made up to several days in advance—perfect for busy schedules during Halloween.
How many servings does this recipe yield?
This recipe makes about 25 adorable spider treats, perfect for sharing with friends and family during spooky celebrations!
Final Thoughts
I hope you enjoy making these delightful Spider Oreo Treats! They’re not only fun to create but also sure to bring smiles wherever they go. Whether you’re whipping them up for a Halloween party or just craving something sweet, these little spiders are bound to be a hit. Have fun experimenting with decorations and flavors, and most importantly, enjoy every bite! Happy baking!
Spider Oreo Treats
Get ready to delight your guests this Halloween with these adorable Spider Oreo Treats! In just 20 minutes, you can whip up a batch of 25 creepy, crawly confections that are sure to impress both kids and adults. Made with only four easy-to-find ingredients, these no-bake treats combine the rich, classic flavor of Oreos with creamy goodness and playful decorations. Perfect for school parties, family gatherings, or just a fun night in, these spooky bites not only look great but also offer a fun cooking experience for the whole family. Roll up your sleeves and enjoy crafting these delightful spider treats!
- Prep Time: 10 minutes
- Cook Time: 10 minutes
- Total Time: 20 minutes
- Yield: Makes approximately 25 servings 1x
- Category: Dessert
- Method: No-Bake
- Cuisine: American
Ingredients
- 18 oz. package of Oreo cookies
- 8 oz. cream cheese (softened)
- 6 oz. chocolate melting wafers
- 50 candy eyeballs
Instructions
- Crush Oreo cookies in a food processor until fine crumbs form. Set aside 2/3 cup for later coating.
- Add softened cream cheese to the remaining cookie crumbs in the processor and blend until well combined.
- Roll the mixture into 25 small balls and coat them in reserved Oreo crumbs.
- Melt chocolate wafers in a microwave-safe bowl, stirring every 20 seconds until smooth.
- Pipe chocolate onto parchment paper to create spider legs; chill for about 10 minutes to set.
- Attach candy eyeballs to each spider body using melted chocolate and insert the chocolate legs.
Nutrition
- Serving Size: 1 serving
- Calories: 80
- Sugar: 7g
- Sodium: 30mg
- Fat: 4g
- Saturated Fat: 2g
- Unsaturated Fat: 1g
- Trans Fat: 0g
- Carbohydrates: 10g
- Fiber: <1g
- Protein: <1g
- Cholesterol: <5mg