Halloween No Bake Cheesecake
If you’re looking for a delightful dessert that captures the spirit of Halloween, look no further! This Halloween No Bake Cheesecake is not only easy to whip up but also brings a festive touch to any gathering. I love how quickly it comes together—seriously, you can make this in under 10 minutes! Plus, it’s perfect for busy weeknights or family gatherings when you want something special without the fuss of baking.
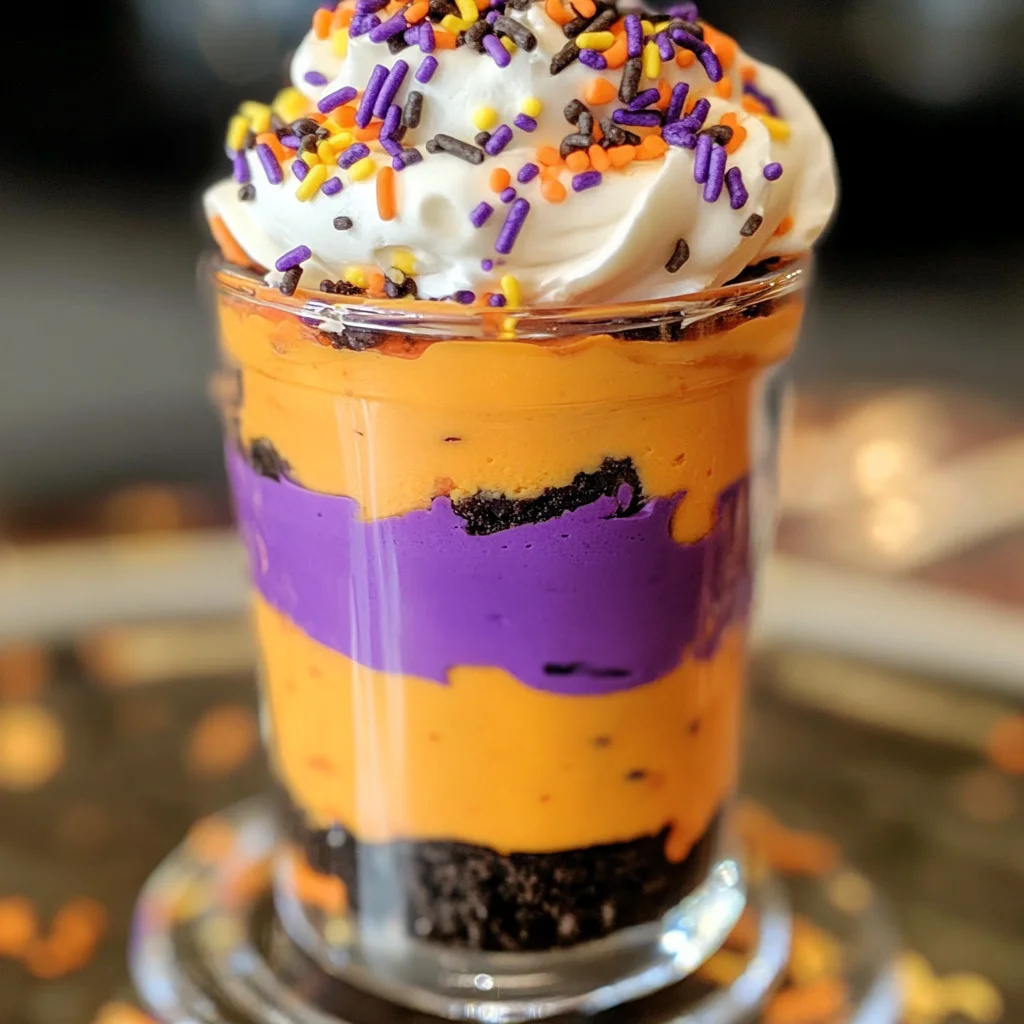
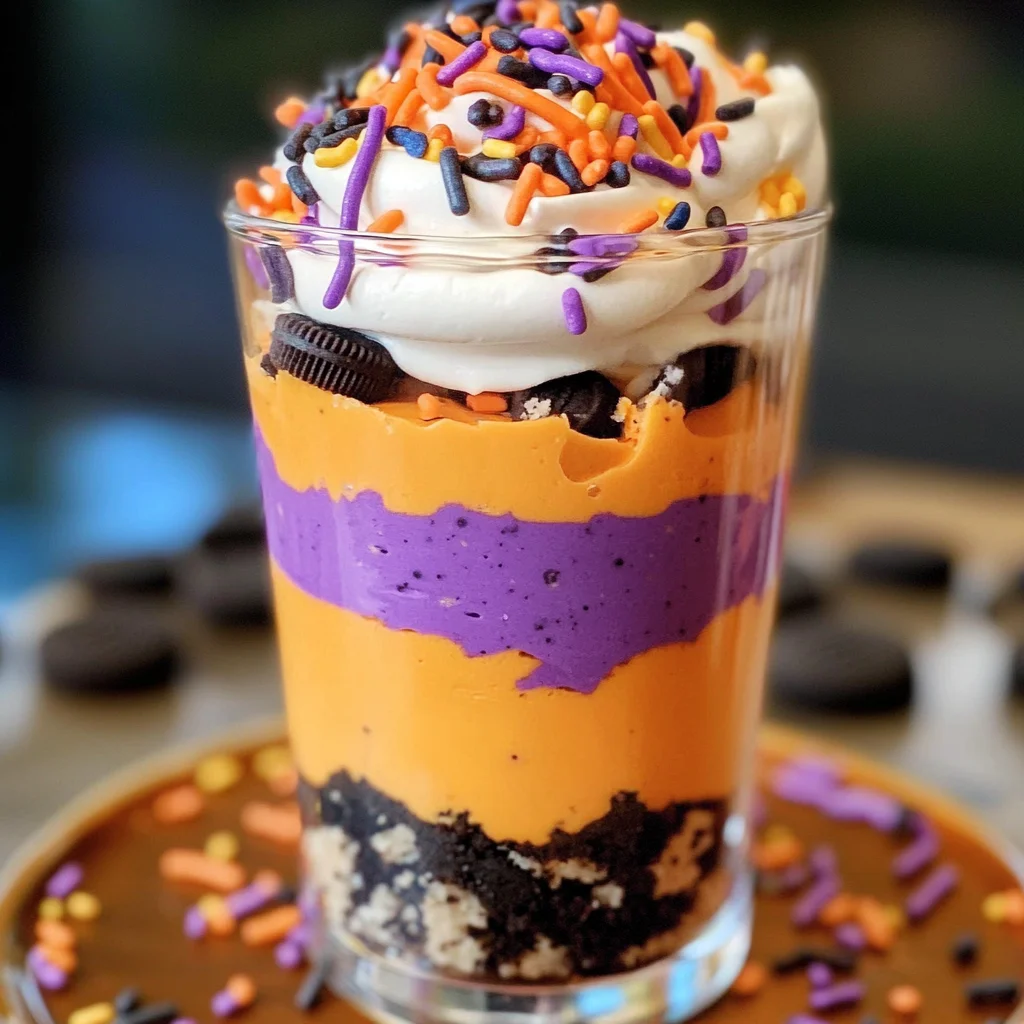
What’s truly magical about this recipe is its vibrant colors and creamy texture. The cheerful orange and purple layers are sure to impress your friends and family, making it a show-stopper at parties. Whether you’re celebrating Halloween or just treating yourself on a cozy fall evening, this cheesecake will steal the spotlight!
Why You’ll Love This Recipe
- Quick and Easy: With just 10 minutes of prep time, you can have this stunning dessert ready to chill.
- No Baking Required: Enjoy all the creamy goodness of cheesecake without turning on the oven.
- Family-Friendly Fun: The colorful layers are not only eye-catching but also fun for kids to help with.
- Make-Ahead Delight: Prepare it in advance to save time on busy days or special occasions.
- Customizable Toppings: Add your favorite sprinkles or candy for an extra festive flair!
Ingredients You’ll Need
This recipe uses simple, wholesome ingredients that you might already have in your kitchen. Here’s what you’ll need to create your Halloween No Bake Cheesecake:
For the Cheesecake Filling
- 2 cups heavy whipping cream
- 1 cup powdered sugar
- 1 teaspoon vanilla extract
- 8 ounces cream cheese (softened)
For the Color
- Orange gel food coloring
- Purple gel food coloring
For the Crunch
- 8 Oreo cookies
For Topping
- Sprinkles
Variations
The beauty of this recipe is its flexibility! Feel free to mix things up with these fun variations:
- Change the Colors: Use different gel food colors like green and black for a spooky twist!
- Add Flavor: Mix in some lemon zest or pumpkin spice for a unique flavor profile.
- Swap the Cookies: Try using chocolate sandwich cookies or graham crackers for different textures.
- Top it Differently: Instead of sprinkles, use crushed candy corn or chocolate chips for added crunch.
How to Make Halloween No Bake Cheesecake
Step 1: Whip the Cream
Start by adding heavy whipping cream to a mixer bowl. Beat at medium speed until it begins to thicken. Then, raise your speed to high and continue beating until stiff peaks form. This step is crucial because well-whipped cream gives your cheesecake that light and airy texture we all love. Once that’s done, add in the powdered sugar and vanilla extract, mixing until everything is well incorporated.
Step 2: Prepare the Cream Cheese Mixture
Next, grab another bowl and add your softened cream cheese. Beat it on medium speed until it’s light and fluffy—this usually takes about 2-3 minutes. It’s important to get that fluffiness here; it ensures your cheesecake filling will be smooth and creamy.
Step 3: Combine Cream with Cream Cheese
Now, take your larger bowl of sweetened whipped cream and fold it into the cream cheese mixture gently. You want these two mixtures to marry beautifully without losing all that air you’ve whipped into the cream. This will create a luscious filling!
Step 4: Color Your Filling
Divide your mixture into two bowls. Add around 8-10 drops of orange gel food coloring to one bowl and purple gel food coloring to the other. Stir each bowl gently until the colors are well combined—remember to use separate spoons so they don’t mix!
Step 5: Pipe Your Fillings
Spoon each colored filling into separate piping bags along with any reserved whipped cream. Stand them up in glasses so they’re ready for layering.
Step 6: Crush Your Oreos
Place your Oreo cookies in a zip-top bag, squeeze out excess air, and seal it tight. Use a rolling pin to crush them into fine crumbs; this will serve as a tasty base for our cheesecake.
Step 7: Layer Your Dessert
In each serving glass, spoon some crushed Oreo cookies at the bottom followed by alternating layers of orange and purple cheesecake filling from your piping bags. Don’t forget to finish off with a dollop of whipped cream on top—it’s like icing on the cake!
Step 8: Chill Before Serving
Finally, place your beautifully layered cheesecakes in the fridge for about three hours before serving. This helps everything set nicely and makes each bite just divine!
There you have it—your very own Halloween No Bake Cheesecake! Perfectly spooky and absolutely delicious, it’s bound to become a cherished recipe in no time! Enjoy every creamy bite!
Pro Tips for Making Halloween No Bake Cheesecake
Creating the perfect Halloween No Bake Cheesecake can be a fun experience, and a few simple tips can elevate your dessert game!
-
Use room temperature cream cheese: This ensures a smooth and creamy filling without any lumps. Cold cream cheese can lead to an uneven texture in your cheesecake.
-
Whip the cream well: Beating the heavy whipping cream until stiff peaks form is crucial for achieving a light and airy cheesecake. This will give your dessert the right consistency and make it delightful to eat.
-
Alternate layers carefully: When piping the orange and purple filling, take your time to alternate layers for a visually appealing presentation. This not only enhances the look but also provides a pleasant balance of flavors with each bite.
-
Chill thoroughly: Allowing the cheesecake to chill for at least 3 hours helps it set properly, making it easier to serve and enjoy. The longer it chills, the better the flavors meld together.
-
Get creative with colors: Feel free to adjust the amount of food coloring or even add other colors like green or black for a spookier effect! Personalizing your cheesecake makes it uniquely yours and adds to the festive spirit.
How to Serve Halloween No Bake Cheesecake
Presentation is key when it comes to serving your Halloween No Bake Cheesecake. Here are some ideas to make your dessert stand out at your next gathering!
Garnishes
- Whipped cream: A dollop of freshly whipped cream on top adds lightness and complements the rich flavors of the cheesecake.
- Candy corn: These colorful candies not only enhance the Halloween theme but also add a sweet crunch that contrasts beautifully with the creamy texture.
- Chocolate spider web: Drizzling melted chocolate over the top creates an eye-catching design that’s sure to impress guests while amplifying those sweet flavors.
Side Dishes
- Fruit salad: A refreshing mix of seasonal fruits like apples, pears, and grapes pairs perfectly with the richness of the cheesecake. It adds a burst of freshness that balances out the dessert.
- Pumpkin spice cookies: These chewy cookies echo fall flavors and provide a festive touch alongside your cheesecake. Plus, they’re great for dipping!
- Vanilla ice cream: A scoop of vanilla ice cream adds temperature contrast and makes each bite even more indulgent. The simplicity of vanilla allows the cheesecake’s flavors to shine through.
- Hot apple cider: Offering warm drinks like spiced apple cider can create a cozy atmosphere while complementing the fall-inspired dessert beautifully.
With these serving suggestions and pro tips, you’re all set to wow your guests with this delightful Halloween No Bake Cheesecake! Happy baking!
Make Ahead and Storage
This Halloween No Bake Cheesecake is not only a delightful treat but also perfect for meal prep. You can whip it up ahead of time, making your party planning much easier and allowing the flavors to meld beautifully while chilling in the fridge.
Storing Leftovers
- Store any leftovers in an airtight container in the refrigerator.
- Enjoy them within 3 days for the best taste and texture.
- If you have layers of filling remaining, keep them separated from the crust to maintain crunchiness.
Freezing
- While this cheesecake is best enjoyed fresh, you can freeze it if needed.
- Cover each individual serving with plastic wrap and then place them in a freezer-safe container.
- Freeze for up to 1 month. Thaw in the refrigerator overnight before serving.
Reheating
- This dessert is served chilled, so there’s no need to reheat!
- Simply remove from the fridge a few minutes before serving for optimal flavor and creaminess.
FAQs
Here are some common questions about this delicious dessert!
How long does it take to make Halloween No Bake Cheesecake?
This recipe takes just about 10 minutes to prepare, followed by a chilling time of at least 3 hours. It’s quick and easy, perfect for last-minute gatherings!
Can I make Halloween No Bake Cheesecake ahead of time?
Absolutely! This cheesecake can be made a day or two in advance. Just store it properly in the fridge until you’re ready to serve!
What can I use instead of heavy whipping cream?
If you’re looking for a lighter alternative, you can use coconut cream as a substitute for heavy whipping cream while still achieving that fluffy texture.
Can I customize the colors of my cheesecake?
Definitely! Feel free to experiment with different gel food coloring to make your cheesecake match your party theme or personal preferences!
Is there a gluten-free option for this recipe?
Yes! You can easily substitute Oreo cookies with gluten-free cookies or even homemade gluten-free crust options.
Final Thoughts
I hope you enjoy making this Halloween No Bake Cheesecake as much as I do! It’s such a fun and festive treat that brings joy to any occasion. Remember, the key is to embrace your creativity with colors and toppings! Wishing you a spook-tacular time whipping up this delicious dessert—happy baking!
Halloween No Bake Cheesecake
Indulge in the festive spirit of Halloween with this delightful No Bake Cheesecake. Perfect for parties or cozy family gatherings, this creamy dessert is quick to prepare, taking just 10 minutes of active time before chilling. With vibrant orange and purple layers, it’s sure to impress both kids and adults alike. The combination of sweetened cream cheese and whipped cream creates a luscious filling, while crushed cookies provide a satisfying crunch at the base. You can easily customize the colors and flavors to match your celebration theme. All in all, this easy dessert is a spooky treat that will be a hit at any fall gathering!
- Prep Time: 10 minutes
- Cook Time: None
- Total Time: 0 hours
- Yield: Serves 6
- Category: Dessert
- Method: No Bake
- Cuisine: American
Ingredients
- 2 cups heavy whipping cream
- 1 cup powdered sugar
- 1 teaspoon vanilla extract
- 8 ounces cream cheese (softened)
- Orange gel food coloring
- Purple gel food coloring
- 8 Oreo cookies
Instructions
- In a mixer bowl, whip heavy cream until stiff peaks form. Gradually add powdered sugar and vanilla extract.
- In another bowl, beat softened cream cheese until light and fluffy.
- Gently fold the whipped cream into the cream cheese mixture until well combined.
- Divide the mixture into two bowls; tint one with orange gel food coloring and the other with purple gel food coloring.
- Spoon each color into piping bags for layering.
- Crush Oreo cookies and layer them in serving glasses as the base.
- Alternate piping layers of orange and purple cheesecake filling on top of the cookie crumbs.
- Chill for at least 3 hours before serving.
Nutrition
- Serving Size: 1 glass (150g)
- Calories: 350
- Sugar: 25g
- Sodium: 100mg
- Fat: 28g
- Saturated Fat: 17g
- Unsaturated Fat: 9g
- Trans Fat: 0g
- Carbohydrates: 27g
- Fiber: 1g
- Protein: 3g
- Cholesterol: 70mg