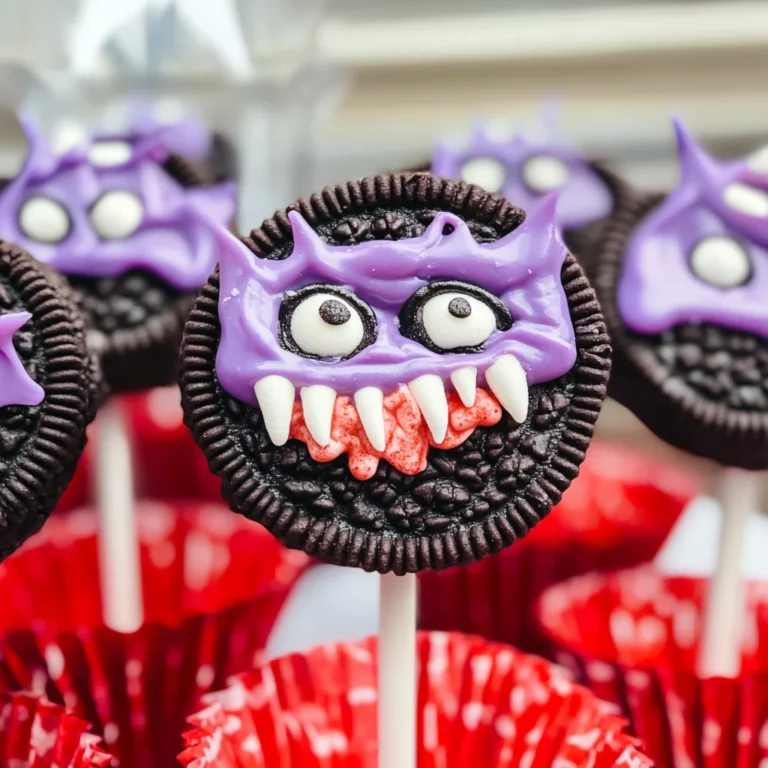
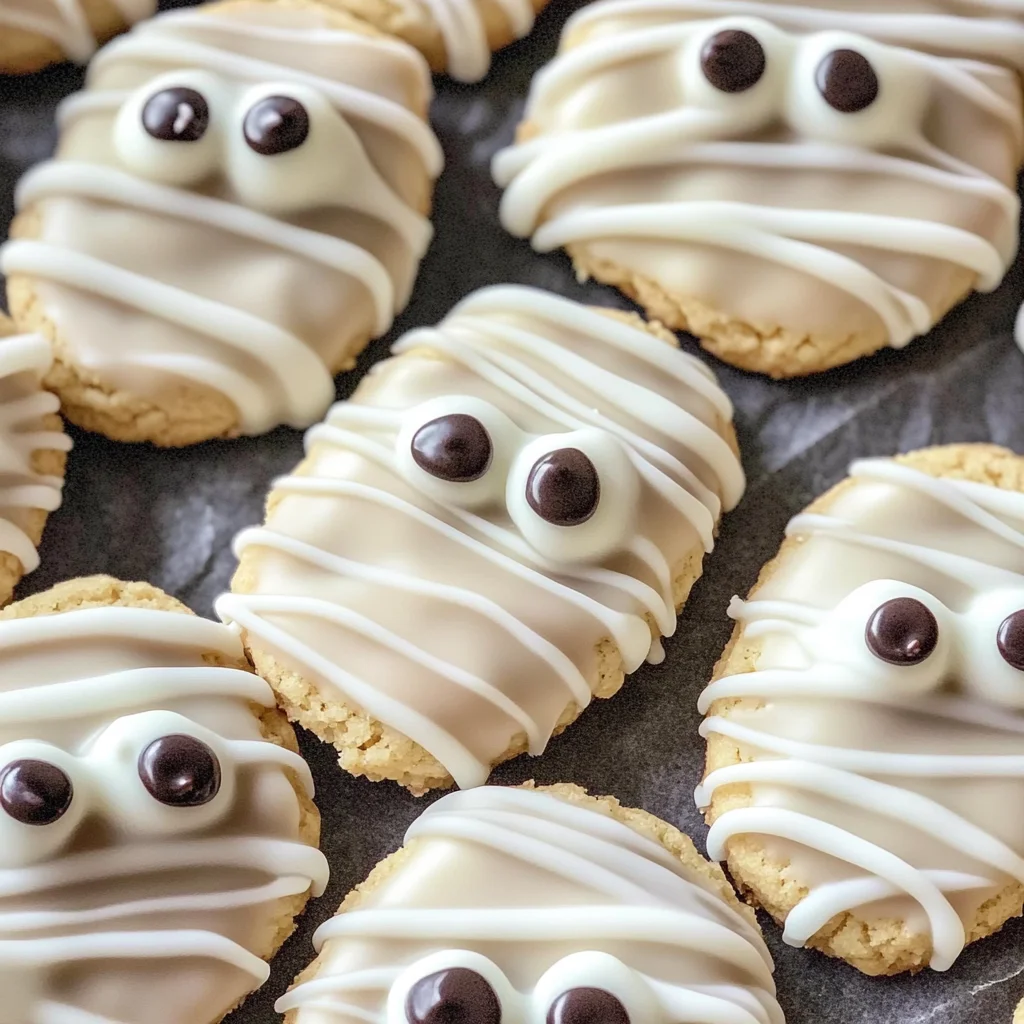
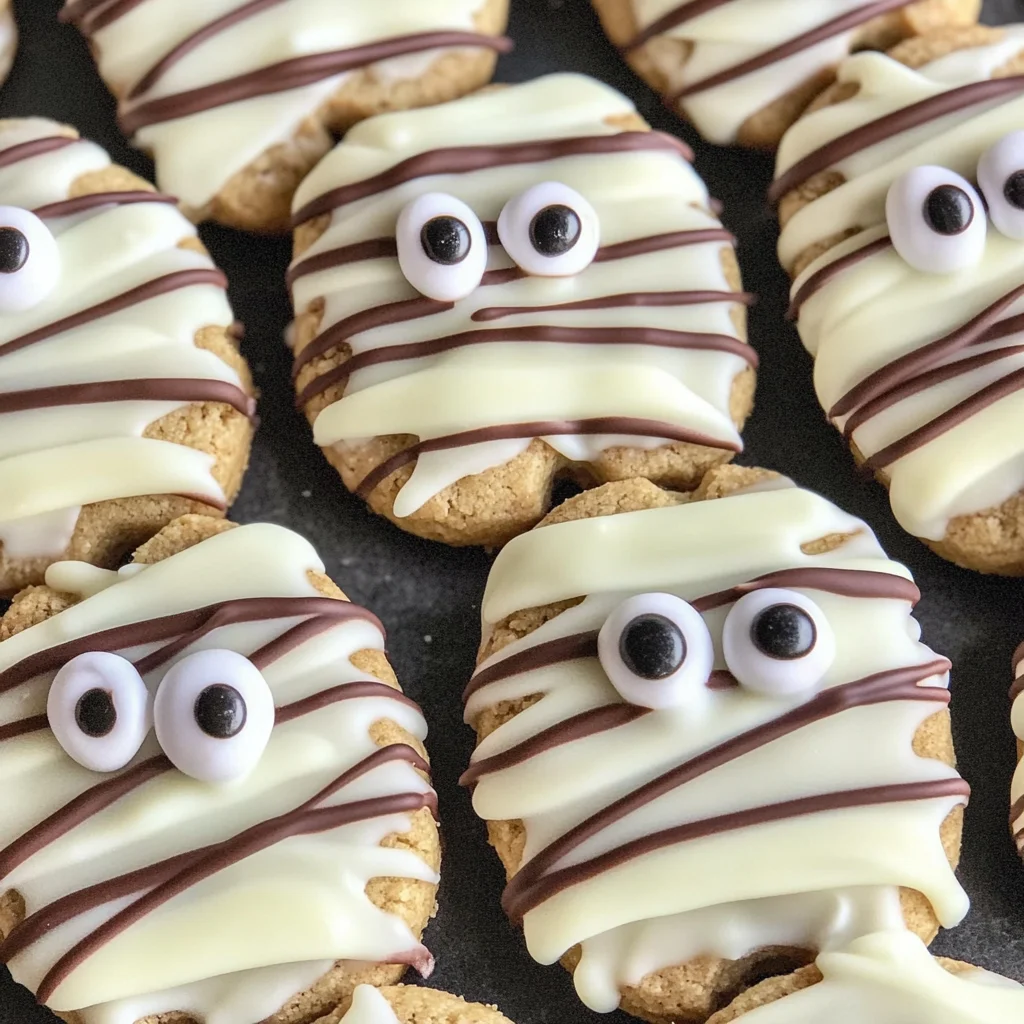
Nutter Butter Mummies
If you’re looking for a fun and festive treat to celebrate Halloween, you’ve come to the right place! Nutter Butter Mummies are not just adorable; they’re also incredibly simple to whip up, making them the perfect addition to any Halloween gathering or even a cozy night at home. These delightful cookies bring a smile to everyone’s face, and their easy preparation means you won’t be spending hours in the kitchen.
What I love most about these Nutter Butter Mummies is their versatility. Whether you’re treating the kids after school or bringing a sweet surprise to a potluck, these little mummies are sure to impress. Plus, they require just a handful of ingredients that you probably have on hand, making them an excellent choice for those busy weeknights when you need a quick dessert idea.
Why You’ll Love This Recipe
- Super Easy: You only need four ingredients, so even novice bakers can create something special!
- Family-Friendly Fun: Making these mummies is a great activity for kids; they’ll love helping with the decorating.
- Perfectly Festive: These treats are ideal for Halloween parties or any spooky-themed gathering.
- Quick Prep Time: In just 20 minutes, you’ll have a delicious dessert ready to go.
- Make-Ahead Convenience: Prepare these treats ahead of time and store them in an airtight container until your event.
Ingredients You’ll Need
Let’s talk about the ingredients! This recipe uses simple, wholesome components that are easy to find. Here’s what you’ll need to make your very own Nutter Butter Mummies:
- 8 Nutter Butter Cookies
- 1 (12 oz) bag White Chocolate Chips
- 16 Candy Eyes
Variations
The beauty of this recipe lies in its flexibility! Feel free to get creative with different flavors and decorations. Here are some fun ideas:
- Swap the Chocolate: Try using colored candy melts instead of white chocolate for a more vibrant mummy.
- Add Some Crunch: Sprinkle crushed nuts or cookie crumbs over the melted chocolate for extra texture and flavor.
- Mix Up the Eyes: Use different types of candy for eyes—like mini chocolate chips or colored sprinkles—to give each mummy its own personality!
- Go Nut-Free: If needed, substitute Nutter Butter Cookies with nut-free cookies for an allergy-friendly option.
How to Make Nutter Butter Mummies
Step 1: Prepare Your Workspace
Start by laying out parchment paper on your countertop. This will be your workspace where all the magic happens! Parchment paper helps prevent sticking and makes cleanup super easy.
Step 2: Melt the Chocolate
In a small microwave-safe bowl, melt your white chocolate chips. Heat them in short bursts of about 30 seconds, stirring in between until smooth. This step is crucial because evenly melted chocolate will coat your cookies beautifully without clumping.
Step 3: Coat the Cookies
Now comes the fun part! Dunk each Nutter Butter into the melted chocolate, ensuring it’s fully coated. Tap off any excess chocolate against the side of the bowl before placing it on your prepared parchment paper. Stick two Candy Eyes into place before the chocolate hardens—this gives your mummies their adorable expressions!
Step 4: Drizzle for Effect
Once all your cookies have set and the chocolate has hardened, melt any remaining chocolate again. Now drizzling it over your mummies creates that classic mummy look! It adds an extra touch of charm and makes them truly festive.
And there you have it—your very own Nutter Butter Mummies ready to delight friends and family alike! Enjoy every bite of these spooky treats!
Pro Tips for Making Nutter Butter Mummies
Making Nutter Butter Mummies is not just about following the recipe; it’s about creating fun and delightful treats that everyone will love! Here are some pro tips to make your mummies even more special:
-
Use high-quality chocolate: Investing in good quality white chocolate chips will enhance the flavor of your mummies and make them look more appealing.
-
Don’t rush the melting process: Melting chocolate can be tricky. Use short bursts in the microwave, stirring frequently, to prevent burning and achieve a smooth consistency.
-
Experiment with candy eyes: While traditional candy eyes are adorable, you can also use colored sprinkles or edible glitter for a spooky twist!
-
Chill before drizzling: If your dipped cookies are too warm, the drizzle might slide off. Let them chill in the fridge briefly before adding the mummy wrap.
-
Have fun with presentation: Use colorful plates or Halloween-themed platters to serve your mummies. A little creativity goes a long way in making your treats pop!
How to Serve Nutter Butter Mummies
Presenting your Nutter Butter Mummies can elevate their charm! Here are some fun ideas for serving these adorable treats at your next Halloween gathering.
Garnishes
- Chocolate shavings: Sprinkle finely grated dark chocolate on top for an extra layer of flavor and texture.
- Mini pumpkin candies: Add a few mini pumpkin candies around your mummies on the plate to create a festive theme.
- Coconut flakes: Lightly sprinkle shredded coconut around the mummies to mimic spiderwebs, enhancing the spooky aesthetic.
Side Dishes
-
Pumpkin Spice Popcorn: This sweet and savory treat is perfect for snacking alongside your mummies. The warm spice complements the sweetness of the cookies beautifully.
-
Veggie Skeleton Platter: Create a fun platter with assorted vegetables shaped like skeleton bones. It’s healthy, crunchy, and offers a nice contrast to the sweetness of the Nutter Butter Mummies.
-
Monster Fruit Cups: Fill clear cups with an assortment of colorful fruits like grapes, blueberries, and mandarin oranges. They add freshness and balance out the dessert table.
-
Chocolate-Covered Pretzels: These salty-sweet bites pair wonderfully with your mummies, providing an extra crunch that everyone will enjoy.
With these serving suggestions and pro tips, you’re ready to impress your guests with delightful Nutter Butter Mummies that are both cute and delicious! Happy Halloween baking!
Make Ahead and Storage
Nutter Butter Mummies are perfect for meal prep, making them a delightful treat you can whip up ahead of time. Whether for a party or just to enjoy at home, storing and preparing these cute mummies in advance is a breeze.
Storing Leftovers
- Store any leftover Nutter Butter Mummies in an airtight container.
- Keep them at room temperature for up to 3 days.
- If you have leftovers, place parchment paper between layers to avoid sticking.
Freezing
- These treats can be frozen for longer storage.
- Wrap individual mummies in plastic wrap before placing them in a freezer-safe bag.
- They can be frozen for up to 2 months. Just remember to label the bag with the date!
Reheating
- No reheating is necessary since these mummies are best enjoyed at room temperature.
- If desired, let them sit out for a bit after freezing to soften slightly before serving.
FAQs
Here are some common questions you might have about making Nutter Butter Mummies.
Can I make Nutter Butter Mummies ahead of time?
Absolutely! You can prepare Nutter Butter Mummies a day or two in advance. Just store them properly in an airtight container until you’re ready to serve.
What can I use instead of white chocolate chips for Nutter Butter Mummies?
If you’re looking for an alternative, you can try using dairy-free chocolate chips or carob chips. They will give your mummies a unique twist while still being delicious!
How do I decorate Nutter Butter Mummies?
You can get creative with decorations! Try adding sprinkles or edible glitter along with the candy eyes for extra fun and festivity.
Are there any variations I can try with Nutter Butter Mummies?
Yes! You can experiment with different types of chocolate coatings, such as dark or milk chocolate. You could also use different candies or toppings for variety!
Final Thoughts
Nutter Butter Mummies are not only adorable but also incredibly simple to make! They’re perfect for Halloween gatherings or just as a sweet treat anytime you want something fun. I hope you enjoy making this recipe as much as I do—it’s always a hit! Happy baking, and don’t forget to share your creations with friends and family!
Nutter Butter Mummies
Nutter Butter Mummies are the perfect festive treat for Halloween! These adorable cookie mummies are not only simple to make, but they also bring a touch of whimsy to any gathering. With just a few ingredients, you can create delightful snacks that kids and adults alike will enjoy. Whether you’re hosting a spooky party or looking for a fun activity to do with the family, these treats are sure to impress. In just 20 minutes, you can have these charming cookies ready to delight your guests. Get ready for some creative baking fun!
- Prep Time: 10 minutes
- Cook Time: 10 minutes
- Total Time: 20 minutes
- Yield: Makes 8 servings 1x
- Category: Dessert
- Method: Baking
- Cuisine: American
Ingredients
- 8 Nutter Butter Cookies
- 1 (12 oz) bag White Chocolate Chips
- 16 Candy Eyes
Instructions
- Prepare your workspace by laying parchment paper on a countertop.
- Melt the white chocolate chips in a microwave-safe bowl using short bursts of 30 seconds, stirring until smooth.
- Dip each Nutter Butter cookie into the melted chocolate, ensuring it’s fully coated. Tap off excess chocolate and place on parchment paper.
- Before the chocolate hardens, press two candy eyes onto each cookie.
- Drizzle any remaining melted chocolate over the cookies for an authentic mummy look.
Nutrition
- Serving Size: 1 serving
- Calories: 160
- Sugar: 14g
- Sodium: 25mg
- Fat: 8g
- Saturated Fat: 4g
- Unsaturated Fat: 4g
- Trans Fat: 0g
- Carbohydrates: 21g
- Fiber: 0g
- Protein: 2g
- Cholesterol: 0mg