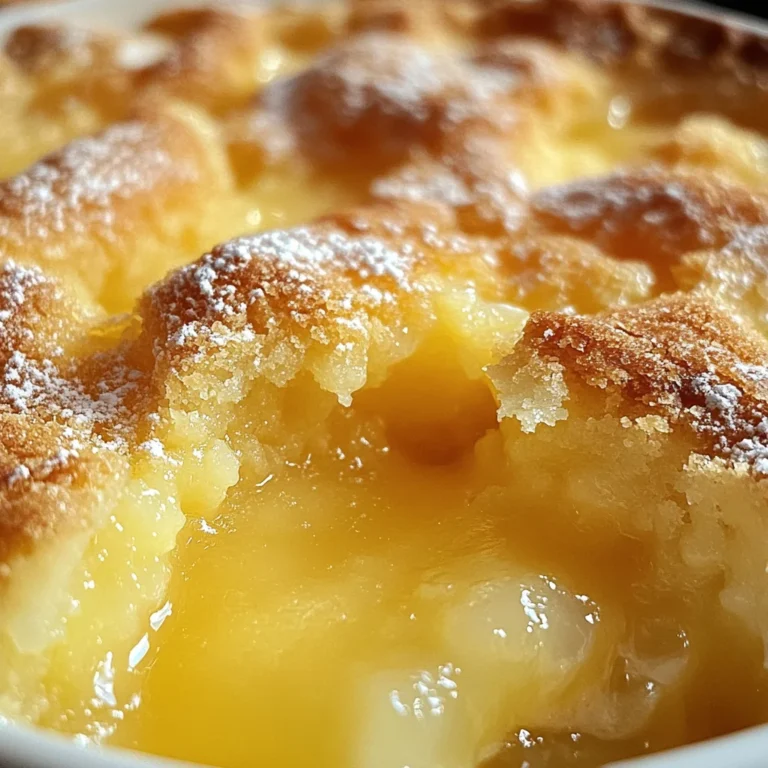
Oreo Dump Cake Recipe
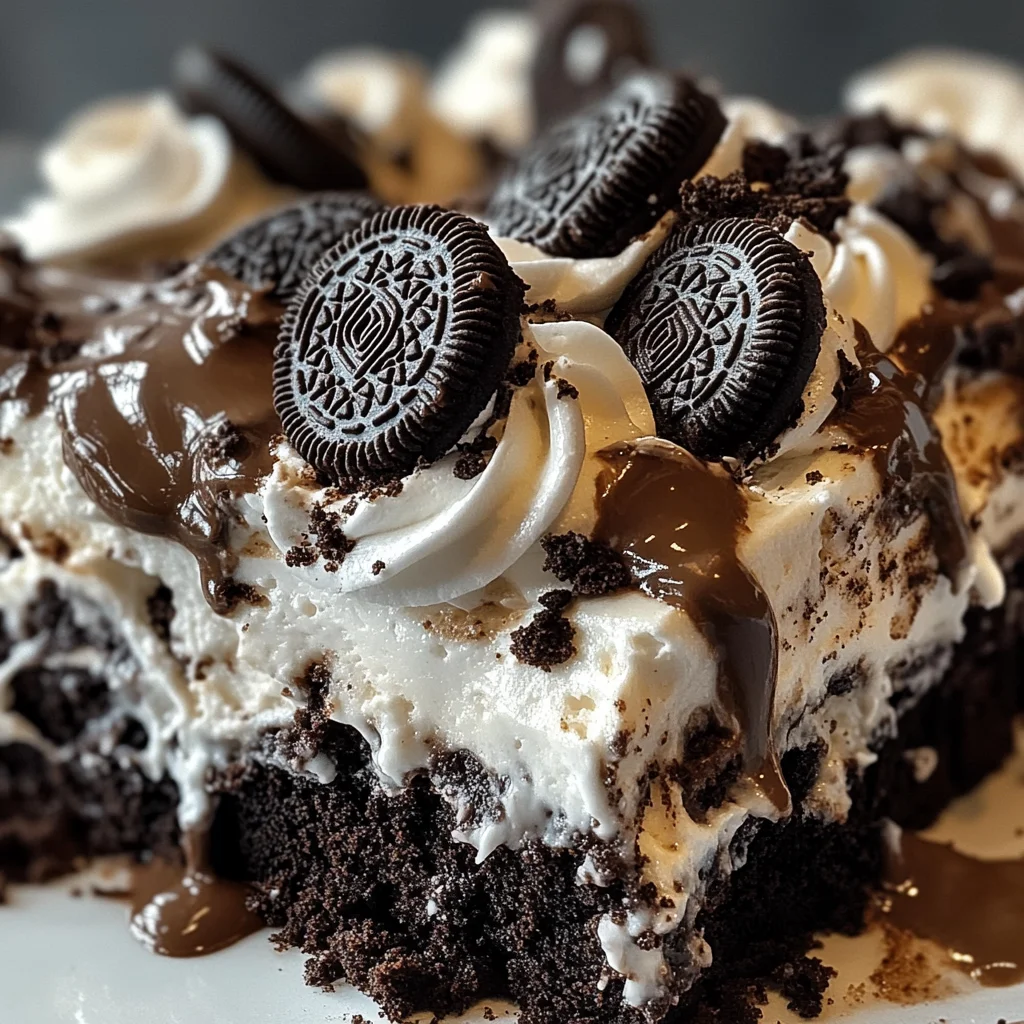
If you’re looking for a dessert that’s as easy to make as it is delicious, this Oreo Dump Cake Recipe is just what you need! Imagine a sweet, creamy delight that combines the beloved taste of Oreo cookies with rich chocolate cake. It’s a treat that comes together in no time, making it perfect for busy weeknights or family gatherings. Each bite is a nostalgic reminder of childhood treats, and I can guarantee it will bring smiles all around the table!
This recipe holds a special place in my heart because it requires minimal effort, yet delivers maximum satisfaction. Whether you’re hosting friends or just satisfying a sweet tooth, this dump cake is sure to impress!
Why You’ll Love This Recipe
- Super Easy to Make: With just a few simple steps, you’ll have a delightful dessert ready to share.
- Family-Friendly Appeal: Kids and adults alike can’t resist the combination of Oreos and chocolate—it’s a guaranteed crowd-pleaser!
- No Fuss Clean-Up: This recipe doesn’t require complicated equipment or techniques. Just mix and bake!
- Perfect for Any Occasion: Whether it’s a casual dinner or a festive celebration, this cake fits right in.
- Make-Ahead Convenience: You can easily prepare this dessert ahead of time and pop it in the oven when you’re ready to serve.
Ingredients You’ll Need
Let’s talk about the ingredients! They’re simple and wholesome, making this Oreo Dump Cake both delicious and accessible. Here’s what you’ll need:
- 25 Oreo cookies
- 14 oz can Sweetened Condensed Milk
- 8 oz Whipped Topping (Cool Whip), not frozen
- 15¼ oz Chocolate cake mix
- ½ cup Sweet Salted Butter, sliced
Variations
One of the best things about this recipe is how flexible it can be! Feel free to get creative with your ingredients. Here are some fun variation ideas:
- Add Extra Chocolate: Mix in chocolate chips for an extra gooey texture.
- Try Different Cookies: Swap out Oreos for other sandwich cookies like peanut butter or mint varieties for a twist.
- Top It Off: Drizzle caramel or chocolate sauce over the finished cake for an elegant presentation.
- Make It Gluten-Free: Use gluten-free chocolate cake mix and gluten-free cookies to cater to dietary needs.
How to Make Oreo Dump Cake Recipe
Step 1: Preheat Your Oven
Start by preheating your oven to 350°F (175°C). This step is crucial because it ensures that your cake bakes evenly and achieves that wonderful golden-brown top.
Step 2: Prepare the Base
In a 9×13-inch baking dish, crush the Oreo cookies. Spread them evenly across the bottom of the dish. This creates a delicious cookie crust that adds texture and flavor.
Step 3: Add Sweetened Condensed Milk
Pour the sweetened condensed milk evenly over the crushed Oreos. This layer brings sweetness and moisture to your cake—trust me; you don’t want to skip this step!
Step 4: Layer on Whipped Topping
Dollop the whipped topping (Cool Whip) over the condensed milk layer. Gently spread it out. This adds creaminess that balances perfectly with the richness of the chocolate.
Step 5: Sprinkle on Cake Mix
Now sprinkle the chocolate cake mix evenly on top of the whipped topping without mixing! Keeping these layers distinct makes for a beautiful presentation and ensures each slice has all those lovely flavors combined.
Step 6: Add Butter Slices
Slice your butter into thin pieces and spread them evenly on top of the cake mix. The butter will melt during baking, adding moisture and flavor throughout.
Step 7: Bake It Up
Bake in your preheated oven for 35-40 minutes, or until you see that lovely golden brown color on top. The aroma will fill your kitchen—it’s hard to resist sneaking a taste before it’s fully cooled!
Step 8: Serve & Enjoy
Allow your dump cake to cool slightly before serving. It’s wonderful warm with extra whipped topping or even a scoop of vanilla ice cream! Enjoy every bite of this delightful dessert with family or friends!
Pro Tips for Making Oreo Dump Cake Recipe
Creating an Oreo Dump Cake is a breeze, but a few tips can take your dessert from good to absolutely delightful!
-
Use fresh ingredients: Using fresh whipped topping and new packages of Oreo cookies ensures the best flavor and texture. Stale ingredients can dull the taste and make your cake less enjoyable.
-
Don’t skip the cooling time: Allowing your dump cake to cool slightly before serving helps it set properly, making it easier to cut into squares. Plus, it enhances the flavors as they meld together.
-
Experiment with flavors: While this recipe is fantastic as-is, consider adding a layer of crushed peppermint Oreos or even a drizzle of chocolate syrup on top for a fun twist that adds extra flair.
-
Serve warm for the best experience: This cake is best enjoyed warm, so try serving it right out of the oven! The melty layers create a deliciously gooey treat that’s hard to resist.
-
Make ahead for convenience: You can prepare the layers in advance and store them in the fridge until you’re ready to bake. This makes it easy to serve at parties or family gatherings without last-minute stress!
How to Serve Oreo Dump Cake Recipe
Serving your Oreo Dump Cake in style can elevate your dessert game. Here are some fun ideas to present this delightful treat!
Garnishes
- Chocolate shavings: Add a sprinkle of chocolate shavings on top for an elegant touch that enhances the dessert’s rich flavor.
- Mini Oreo cookies: Place a few mini Oreos on top of each serving as a cute garnish that ties into the cake’s main ingredient.
Side Dishes
- Vanilla ice cream: A scoop of creamy vanilla ice cream pairs perfectly with the warm dump cake, creating a classic combination that everyone loves.
- Fresh berries: Serve alongside strawberries, raspberries, or blueberries for a refreshing contrast that balances the sweetness of the cake.
- Chocolate sauce: Drizzling some chocolate sauce over each slice adds an extra indulgent touch that chocolate lovers will appreciate.
- Whipped cream: A dollop of whipped cream on top or on the side provides a lightness that complements the dense layers of the dump cake beautifully.
Enjoy making this Oreo Dump Cake and have fun experimenting with different presentations and pairings!

Make Ahead and Storage
This Oreo Dump Cake is not only delicious but also perfect for meal prep! You can easily make it ahead of time, making it a great choice for gatherings or sweet cravings throughout the week.
Storing Leftovers
- Allow the cake to cool completely before storing.
- Cover the dish with plastic wrap or aluminum foil.
- Store in the refrigerator for up to 3-4 days.
Freezing
- Ensure the cake has cooled completely before freezing.
- Cut into individual portions and wrap each piece tightly in plastic wrap.
- Place wrapped portions in an airtight container or freezer bag.
- Freeze for up to 2-3 months for best quality.
Reheating
- To reheat, remove from the refrigerator and let sit at room temperature for about 15 minutes.
- Microwave individual portions on medium power for 20-30 seconds, or until warm.
- For frozen portions, thaw in the refrigerator overnight before reheating.
FAQs
Here are some frequently asked questions about this delightful dessert:
Can I make this Oreo Dump Cake Recipe without whipped topping?
Yes! You can substitute the whipped topping with homemade whipped cream or even a dairy-free alternative if preferred.
How do I serve this Oreo Dump Cake Recipe?
This cake is best served warm. You can top it with additional whipped topping or a scoop of vanilla ice cream for an extra indulgent treat!
What can I use instead of Oreos in this Oreo Dump Cake Recipe?
If you want to try something different, consider using another type of chocolate sandwich cookie or even gluten-free cookies for a unique twist.
How long does this Oreo Dump Cake Recipe last?
When stored properly, leftovers will last in the fridge for about 3-4 days. If frozen, they can be enjoyed for up to 2-3 months.
Final Thoughts
I hope you find joy in making this easy and mouthwatering Oreo Dump Cake! It’s perfect for sharing with friends and family, and its delightful layers bring smiles at any gathering. Enjoy every bite, and don’t forget to get creative with your toppings. Happy baking!
Oreo Dump Cake Recipe

If you’re in search of a dessert that’s both simple to prepare and delightfully indulgent, look no further than this Oreo Dump Cake Recipe! This delicious treat beautifully combines the nostalgic flavors of Oreo cookies with rich chocolate cake, making it a perfect choice for any occasion—from family dinners to festive celebrations. With minimal effort required, you can whip up this crowd-pleaser in no time. Each bite is a creamy, sweet experience that’s bound to bring smiles to everyone around the table. Plus, its make-ahead convenience means you can easily prepare it before your next gathering!
- Prep Time: 15 minutes
- Cook Time: 40 minutes
- Total Time: 55 minutes
- Yield: Serves approximately 12 people 1x
- Category: Dessert
- Method: Baking
- Cuisine: American
Ingredients
- 25 Oreo cookies
- 14 oz can sweetened condensed milk
- 8 oz whipped topping (not frozen)
- 15¼ oz chocolate cake mix
- ½ cup sweet salted butter, sliced
Instructions
- Preheat your oven to 350°F (175°C).
- In a 9×13-inch baking dish, crush the Oreo cookies and spread them evenly across the bottom.
- Pour the sweetened condensed milk over the crushed Oreos.
- Dollop the whipped topping over the condensed milk layer and gently spread it out.
- Sprinkle the chocolate cake mix evenly on top without mixing.
- Evenly distribute slices of butter over the cake mix.
- Bake in the preheated oven for 35-40 minutes until golden brown on top.
- Let cool slightly before serving warm with additional whipped topping or ice cream.
Nutrition
- Serving Size: 1 piece (approximately 100g)
- Calories: 362
- Sugar: 31g
- Sodium: 260mg
- Fat: 18g
- Saturated Fat: 10g
- Unsaturated Fat: 6g
- Trans Fat: 0g
- Carbohydrates: 45g
- Fiber: 2g
- Protein: 4g
- Cholesterol: 30mg